Claus Rasmussen
Wednesday, 6 August 2014


Work from I FOUND OVER THE YEARS THAT A GOOD PLACE TO WORK IS BETWEEN 240 AND 250
“I’ve found over the years that a good place to work is 240 to 245 will give us good white with detail. Anything above 245 is going to start to burn out. On the shadow side, 20 to 25 is a good point of black with detail. Below 20, we’re going to start to block up when we go to the printed page. When we’re working with digital capture, think of it as like transparency film. We cannot overexpose it. It’s very hard to bring back detail that has been overexposed. A good rule of thumb is expose for the highlights and process for the shadows, meaning we can always go into Photoshop and adjust the curves and so forth to create better shadow detail, but we cannot bring back highlight detail once it’s gone too far.
This is the digital interface for the DCB2. It is similar to other cameras. They all have a detail window to show you what you’re looking at close up, an overview window, some type of way to adjust the tonal curve, put in resolution and DPI.
When I’m looking at this, when I’m photographing, what I’m most concerned is where my highlight values are. I want to make sure that I do not overexpose these highlights. Placing these highlights at about 240 to 245 will assure me that I’ve got the proper exposure and I can actually open up the rest of the area in toning.
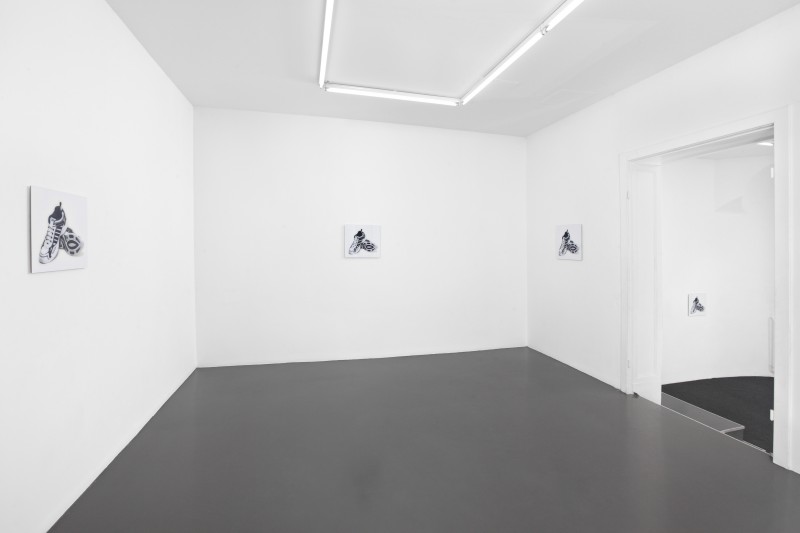
I’m using this example because it’s a very contrast-y shot. We have a white shoe on a white background, and we have a very black, dark sole. Now, you could go in lighting and put in mirrors and spotlights and open this area up, but I’m looking for a very natural falloff. I have a soft box overhead lighting up the background and one soft box over to the side lighting from the left side, and then I also have a fill card on the right side.
The thing that I’m most concerned about when looking at this interface is going to be my curves window, where actually I’m looking at the actual histogram of the image with the curves applied on top of it.
As I’m looking at this, I’m applying a curve that’s going to give me a very good general exposure, and then I’m saving that file. Then, without even changing my exposure, I’m just going to make some adjustments to this curve and I’m going to widen the curve and open the values up, so I have a very much overexposed image, where my black area of the shoe has now been properly exposed but my white areas are totally blown out. I’m not concerned with how blown out these are because I’m only looking to work with the dark areas. We’re going to use luminosity masking to bring these images together.
Moving ahead, I’ve opened up both images into Photoshop, where we can see them both on the screen at the same time. The normally exposed image, we have very good detail in the highlight area, but the shadow area is blocked up. In the second exposure, we have blown-out highlight detail, but we have very, very good exposure down here in the shadow area, where the bottom of the shoe is, is what I’m most concerned with this photograph.
Before I start, I want to make a quick check here to my Quick Mask mode. I’m going to actually double-click on the Quick Mask mode to bring up my Quick Mask options, to make sure that my color indicates the selected area. This is the opposite of the way the default is set up. In real life, in working in the darkroom, the masked area is the colored area, but in this particular case, I find it much easier to see the color as the selected area. Also, the color needs to be opacity 100 percent. That way, we can truly see how dense the selection really is when we’re visually looking at it.
I’m going to say OK to get out of the Quick Mask mode before I hit this technique. I first learned this from Katrin Eismann, and she calls this technique “the claw” for its very odd keyboard shortcut — command-option-tilde. We’re going to first start by going command-zero, control-zero on the PC, to bring me up to full size. I’m going to now apply my claw, which is command-option-tilde.
Now, obviously, the selection is there, but we can’t really see what it’s doing. I’m going to click into the Quick Mask icon to literally see that this area right here, all this white area, has now been grabbed by this selection, and basically, the clear area of this shoe is not being grabbed. That’s not exactly what we want. We want it to be the exact opposite of that.
I’m going to get out of the Quick Mask mode by hitting the Q key again, and I’m going to use the keyboard command to inverse the selection, command-shift-I. That’d be control-shift-I on the PC. Hit my Q key again. Now this is what I’m trying to look at. I’m trying to grab a mask that is grabbing all the dark area of the shot and leaving the white area alone. Think of it as the darker the pixel, the more it’s being grabbed, and the brighter the pixel, the less it’s being grabbed.
Now, we need to make another change here. This is fine to get started, but we need to actually look at this. We can adjust exactly how much of that area is being grabbed by going into levels, and you can see, as I adjust my levels, you can literally see it change. I can actually grab more or less of the black area. I’m going to move this out of the way. You can actually see it changing. The red area is indicating the area that the selection has grabbed. If I wanted to grab just the very, very lowest areas of the shot, I could do that, or I could grab more. In this case, if I wanted to grab the denser, I could move the shadow side up. I’m really looking to try to grab almost all the area but leaving all the white area behind.
I’m going to hit OK. Once I’ve hit that selection, I can hit my Q key again, take me out of the Quick Mask mode, and I’m going to go ahead and do a command-minus, control-minus on a PC, bring me down, so I can see both images at the same time. The key thing at this point is now, holding the shift key down, I’m also in the move tool. I’ve hit the V key to bring me into the move tool, right here. I’m going to go ahead and hold the shift key down, and I’m going to drag this area into the other shot and it’s going to perfectly register this new area on top of the shoe.
Now that I’ve dragged that brighter selection over here, let’s go ahead and go to my layers palette so that we can see that we have a new layer in our layers palette. Let me go ahead and make this full screen, command-zero, and let’s take a look at what we really have.
If I turn off my background layer, what we really have here is just the black part of the shoe. If we go in closer, we can see that we’ve really left all the white part behind. We did not have to go in and cut all the path out, or even when painting the images together, we did not have to be very careful about where we paint from because we’ve left all the white area behind.
Let’s take a look at that. Now, we can still use our layer masking and opacity to really control it even farther.
While we’re on this layer here, I can control the layer opacity by bringing it down, starting at zero. You can see how we’re basically — I’m going to go ahead and use my keyboard commands for this. I’ll just type in 20 percent. You can see it actually getting — I’m going to zoom in a little on that again. 20 percent. 30 percent. 50 percent. 80 percent. 100 percent. We’re actually brightening up that area, much, much, much more detailed area than what we had before.
Taking it back to full size, I need to add a layer mask by clicking on the new-mask icon at the bottom of the layers palette. By clicking on that mask, I will apply it to that layer. Now I can go ahead and pick black to hide, and I’ll go ahead and grab a good-size brush, and I’ll adjust that just a little bit with my bracket key.
As I paint with black, I want to put 50 percent. I can literally erase it where I don’t want it. If I have a little bit too much in this area, I can start bringing it back. I didn’t want to fill in too much of the shadow area in here. If I have a hard time seeing where that is, I can actually click the background layer off and say, “You know what? I really didn’t want to bring any of that area in, and I didn’t want to bring any of this area over here, and I didn’t really want to brighten up the shoe, but I did want to brighten up the bottom.” I’m going to hit my X key to revert that back with the other colors, bring back my white.
The nice thing about it is it’s totally editable. I’m now just nice, giving it a couple of strokes. I’m bringing it back in a few areas where I might’ve taken it off a little bit too much, bringing back my background exposure.
Now I want to turn that on and off once or twice. It looks like it’s a little bit of a problem down here at the bottom, so I’m going to go in close here by zooming in. I think it looks like I need to go ahead and take out a little bit of this down here, so I’m going to go to a much smaller brush and grab about a 100-pixel brush. I’m painting with black, so I’m going to go back to my black color and I want to just take out a little bit of this down in here, because obviously, what I did is I brought in a little too much of the shadow area, which is really not part of that shoe. This is going to make it look a little more natural.
You still need to use your layer masking. By applying the mask first, it isolates the black area away from the mid-tones and the highlights, and it makes it much easier to cut together.
Let’s go ahead and take this down to full size, command-zero. What happens if we didn’t have the ability to take a second shot but we still have this same kind of problem?
Let me go ahead and throw that layer away. Let’s say for a second we only have the one shot and we still have to correct that. I find that it’s easier to correct it with properly exposed pixels than to fix the pixels, but sometimes we don’t have that second shot. If we only had the one shot, this is the one-shot workaround.
Let’s go ahead and apply that same mask again. This time, I’m going to use a different way to apply it. Let me go to the channels palette. Where you see the RGB, I’m going to hold down my command key and click in this channel, and that’s going to apply that same mask again. If I look at that mask, I hit my Q to bring me into Quick Mask mode. I can see the mask. Obviously, it’s grabbing all the white area. I’m going to hit the Q again to get me out of that. Command-shift-I inverses the selection so I can look at that.
OK, well that’s very nice. We need to go ahead and apply some levels to this. Command-L for levels. I’m going to go ahead. I want it to grab a lot less of that area so I’m going to go ahead and move the levels until it looks like I’m grabbing just more of the bottom of the shoe there.
That’s getting closer to what I want to do right there. And say, “OK.”
Now I’m going to need to go ahead and edit that a little bit. While I’m in the quick mask mode, I’m going to go ahead and just paint the areas I really don’t want to be affected as I paint with white.
I’m going to go ahead and move it right up to 100 percent by hitting zero. I’m just going ahead and I’m just painting in all the areas that I don’t really want. I’m going to go ahead and make my brush bigger by using the bracket keys and I just basically don’t really want to affect this area down here. I just really want to affect the sole of the shoe.
As I get closer to the sole of the shoe I want there to be a little more feathers. I want to put it down to 30 percent so that as I stroke it, it’s not going to leave a harsh edge of the brush. It will be a little more gradual in this area.
I’m going to get out of the quick mask mode by hitting the Q key. I can see my selection again.
What I’m going to do now, I’m going to go back to my layers palette. I’m going to make sure I’m in my…Obviously, I have one layer. I’m going to use the keyboard command Command-J. That’s going to take whatever’s a selection and make that into its own layer.
If we take a look at this, I’ll turn off the background layer. As we look at this layer, we can see that all the other part of the layer has been dropped away. But obviously, just having it on isn’t going to do anything. We need to change the layer mode.
What we’re going to do is we’re going to change that to screen mode. I’m going to blow this up a little bigger and I’m going to change this from normal to screen. This is really going to brighten up that shoe. Now I can actually go in here and play with my levels.
Command-L. I’m going to go ahead and brighten up that area by bringing it in. I’m also going to add more contrast by bringing the blacks in. Now, all of a sudden, I’ve got a lot more information here.
Let me go ahead and hit “OK,” and we’ll turn that layer on and off once. We can see what exactly that’s doing. You can see how that’s brightening it up by being in screen mode.
Again, I would have to add a layer masked to that by clicking the “New Mask” icon and then paint with black, obviously, down here where the shadow is. It’s a little bit of a line showing there so I’m going to put it on 50 percent. I’m actually painting in the mask where that shadow is so that we don’t get rid of that line.
If it’s not enough, let’s drag it into the new layer icon and we can duplicate that, make it twice as bright. The difference here is we were shooting here originally. I want to hold my Option key down and click the eyeball. You can turn the layers off. You can see how we were having very good detail in the highlights but our shadow areas are very dark.
As I click on these two screen layers, they’re bringing them back in. I can really now see a lot more detail in this shot. Command-0 to bring it down to full size. That really allows us to take a product that has way too much contrast and be able to get the best parts of both in one shot.
If we look at the values now, we’ll still notice that we are getting great white with detail in the 240s over here on the highlight area of the shoe. And now we’re getting anywhere from in the 30s, 20s, 30s, 40s depending on which area I move to my tool. I’m going to get a smaller pick here. Anywhere between 40s and 50s in here, which is giving a lot of black with detail.
Now that I’ve got that the way I like, I can go ahead and flatten this image, bring those two areas down. Now we have one layer. But this is not giving my client what they really want. What they really want is a shoe on a pure white background. When we have an area…
Let’s go down to the front end of the shoe. You can see how, if we get great detail. 230, 240 here, there’s really no way to get that 255 white. That’s what they’re really going to want is pure, pure white so that it drops into their page layout program.
What I need to do now is create a way to white out that background but hold the realistic shadows. What I like to do is put a path around the shoe. I know it’s hard to see the edge so I’m going to use an adjustment layer to help me define this edge a little better so I can path.
Adjustment layers are not just for correcting the files. They’re also so we can see the files better. I’m going to go into my new adjustment layers. I’m going to hit “Levels,” and hit “OK,” but I’m going to change the blend mode from normal to multiply. This is going to darken the show down, way down, so I can see the white on white edge much better.
In fact, I’m going to do it twice. I’m going to grab this adjustment layer and drag it down here to the new layer icon and make a second one. Now, all of a sudden, as I move my shot down here, I can go ahead and hit the eyeball with my option key. You see the difference between here and here. Much, much easier for me to make a path.
I’m going to go ahead and click my pen tool and when making a path I keep my four fingers, my first four fingers on my hand minus my thumb here on the space bar, command, option and control keys so that I can actually use them to modify the path.
I’m going to just hit…Just do a little bit of the path and we’ll move ahead.
Let me go ahead and just start with the point. I can see this point much better now that I have made this mask. I’m going to pull and drag as I’m going along. I’m using my first finger on the space bar so I can keep moving myself down. I like to work fairly close.
Notice I didn’t get this last point correctly. I can use my command key, control on the PC, to adjust this point to a better spot and then keep on going with the path. What I’m going to do is try to create a nice path around the entire shoe before I take it to the next step.
As I go along here, I’m just using my space bar to move it to another spot and I’m pulling using my Bezier curves as I slowly go around the path. I’ll just go ahead and move ahead to the end of the path here.
Moving ahead, now I’ve finished the path and I can get rid of these two adjustment layers by throwing them in the trash. I only needed them just so I could see better.
I have a pen tool path around the entire shoe. Let’s go to the path palette and you see that I have a shoe outlined. If I hold down my command key and click in the shoe outline pen path, I’ll turn that into a selection any time I need to do that.
Before I do anything drastic here, I want to go to my history palette. I’m going to go to the very top of the history palette and I’m going to throw out that original history snapshot. I’m going to create a new one. This way it includes any of the retouching that I might have done along the way. This is a step I do right before I drop the shadows out. I’m going to make sure that that’s clicked.
Now that I have a selection already activated, I’m going to do a Command-Shift-I to inverse that selection. I want to look at that selection for a second by hitting the Q key bringing me to quick mask mode, and I’d like to feather or alias that selection about three tenths of a pixel.
This gives it a little bit more natural and less cut out feeling. I’m going to go filter, blur, Gaussian blur, and I’m going to type in .3. This will give me just a very slight alias. If I go in very, very close we probably can see that, the difference between…It’s a very, very slight aliasing. That’s on and that’s off. It just gives it a little bit of a feathered edge, just enough to make it look like a natural transition.
Command-0 will take you back down to full size. I’m going to hit OK. I’m going to hit my Q key. It takes me out of the quick mask mode. What I want to do now is I want to knock out that entire background. I’m going to use Command-Delete. It will be Control-Delete on the PC. Fill with the background color white.
Now, I’ve knocked out all my shadows, everything, all the detail is gone. It doesn’t look too good, but the nice thing is I can now click to my history brush and I’m going to use a much, much larger brush by hitting my bracket key a few times. I’m going to go double check and make sure that I am clicked in the snapshot.
What I’m going to do is I’m actually going to bring about 30 percent…I’m going to type three. That will bring me into 30 percent. And now I’m going to bring back the shadow under this shoe, just very slowly, right where I want it, very naturally.
Instead of doing a Photoshop shadow that looks more like a glow, this brings back the real natural shadows. I can just put it right where I want it and I’m not applying any information where I don’t want it.
Now we have something that the client is really going to like. We have pure 255 white. Let me go to my eye picker. We’ve got pure 255 white which will drop out and have no detail. And then, as you go into the shoe, you’ll notice we have nice 240 to 241 highlight detail. As I move myself over to the shadow side of the show, I can see that I have very, very nice shadow detail in here, sometimes as much as 40 or 50.
This allows us to have what I call the perfect dropout. Now, when this goes into a page layout program they don’t have to really do any kind of path or outline around it. They can drop it if it’s going to be on a white background. The white will disappear because it is pure 255 white.”